Customize react-markdown with Custom Renderers
Published: 2020-11-02
All the articles I write for Dhrutara Blogs, including the one you are reading now, are stored as Markdown files. The frontend is built with ReactJS, so I needed an npm package that could convert Markdown content into HTML.
After trying a couple of options, I decided to use react-markdown. It turned out to be a great choice.
Getting started with react-markdown
react-markdown is a React component, which makes it straightforward to integrate into a React application.
The basic setup involves three steps:
1. Install react-markdown
Add react-markdown as a dependency in your package.json and install it:
npm install react-markdown2. Import the component
import ReactMarkdown from 'react-markdown';3. Render your Markdown content
Pass the Markdown content to the ReactMarkdown component:
<ReactMarkdown source={MarkDownText} escapeHtml={false} />Here, MarkDownText contains the Markdown text you want to render.
By default, the built-in image renderer converts Markdown images into HTML <img> elements.
For example:
The react-markdown documentation is easy to follow, and getting started is simple. However, this article isn’t about the basic usage of the library. Instead, I want to show you how to customize its rendering behavior to meet application-specific requirements.
Why use custom renderers?
Sometimes, the default rendering behavior of react-markdown isn’t sufficient for your application.
For example, when building Dhrutara Blogs, I wanted Markdown images to render inside HTML <figure> elements, with a <figcaption> displaying the image’s alternate text.
However, the built-in renderer generates a regular <img> element without the surrounding figure and caption elements.
To achieve the desired output, I created a custom image renderer and registered it with react-markdown.
Let’s see how to implement this.
Step 1: Create a custom image renderer
First, create a React component that defines how you want Markdown images to be rendered.
Here is my ImageRenderer component:
export default function ImageRenderer(props) {
  const imageSrc = props.src;
  const altText = props.alt;

  return (
    <figure className="wp-block-image size-large is-resized">
      <img
        data-loading="lazy"
        data-orig-file={imageSrc}
        data-medium-file={imageSrc + "?w=300"}
        data-large-file={imageSrc + "?w=750"}
        src={imageSrc}
        alt={altText}
        srcSet={
          imageSrc +
          "?w=1024 1024w, " +
          imageSrc +
          "?w=705 705w, " +
          imageSrc +
          "?w=150 150w, " +
          imageSrc +
          "?w=300 300w, " +
          imageSrc +
          "?w=768 768w, " +
          imageSrc +
          "?w=1248 1248w"
        }
        sizes="(max-width: 707px) 100vw, 707px"
      />
      <figcaption style={{ textAlign: "center" }}>
        {altText}
      </figcaption>
    </figure>
  );
}
When you register a custom React component as a renderer, react-markdown passes the corresponding Markdown element’s properties to that component through props.
In this example, the image source and alternate text are available through props.src and props.alt, respectively.
The custom component uses these properties to generate the HTML structure I need:
<figure>wraps the image.<img>displays the image.<figcaption>displays the alternate text as the image caption.
You can use the same approach to customize the rendering of other Markdown elements.
Step 2: Register the custom renderer
Once the custom component is ready, import it into the component where you use ReactMarkdown.
The react-markdown API used in this example provides a renderers property that accepts custom renderers for Markdown elements.
Here is a simplified example using the App component:
import './App.css';
import ImageRenderer from '../src/components/image-renderer';
import ReactMarkdown from 'react-markdown';
const MarkDown = `
# Sample markdown that will be rendered as HTML
## Header2
### Header3
### This image will be rendered as a figure with a caption.

### Complete
`;
function App() {
return (
<div>
<ReactMarkdown
source={MarkDown}
escapeHtml={false}
renderers={{ image: ImageRenderer }}
/>
</div>
);
}
export default App;Notice the following property:
renderers={{ image: ImageRenderer }}This tells react-markdown to use our custom ImageRenderer component whenever it encounters an image in the Markdown content.
You can register additional custom renderers in the same collection if you need to customize other Markdown elements.
Result
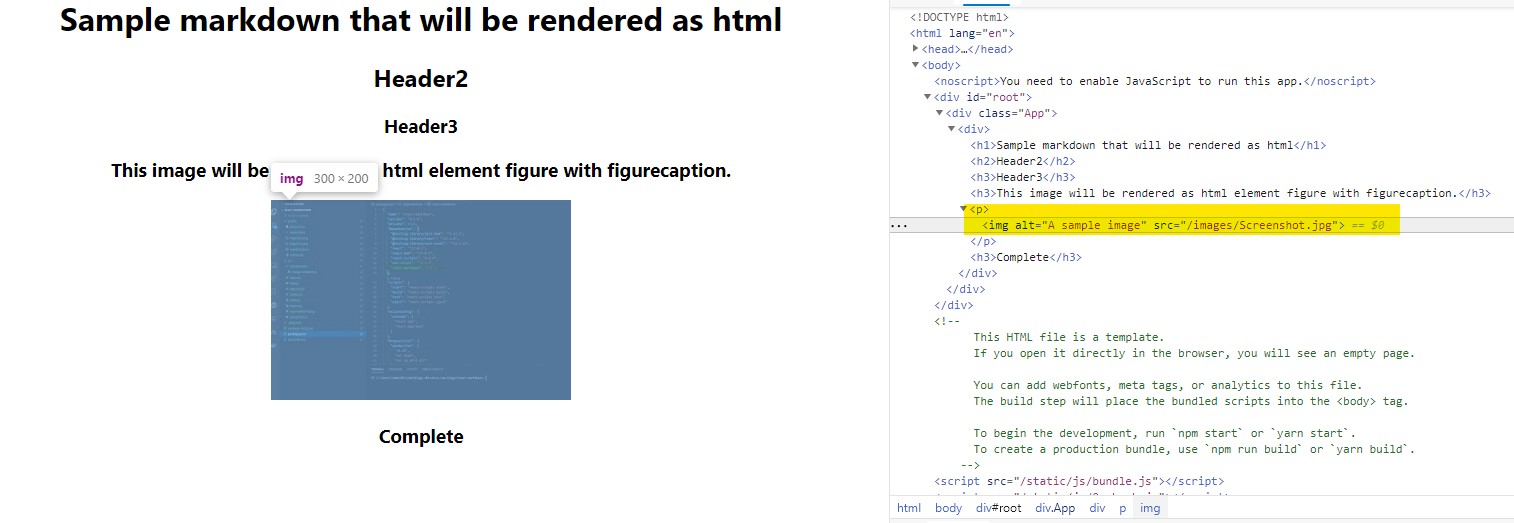
With the custom image renderer registered, Markdown images are rendered inside <figure> elements with <figcaption> elements displaying their alternate text.
Here is the resulting output:

As you can see, custom renderers give you control over how Markdown elements are converted into React components and ultimately displayed in your application.
Source code
I have a working version of this implementation on GitHub, including a couple of additional custom renderers.
You can explore the code and use it as a reference in your own application:
GitHub – react-markdown examples
Happy Markdown rendering!
Note: This article documents the react-markdown API used when it was originally written in 2020. The library’s API has evolved since then. In current versions, custom components are registered through the components prop, and the source and renderers APIs shown above are legacy APIs. If you are starting a new project, refer to the current react-markdown documentation for the appropriate implementation.